Uploading a Netcare Batch
Alberta pharmacies are required by Alberta Health to upload medication records to Alberta Netcare EHR Portal via the Pharmaceutical Information Network (PIN) repository on a daily basis. This is done by uploading prescriptions and DURs in a Batch process. As part of the process, a response file will also be downloaded that contains a list of errors, if any. It is recommended that this process be completed at the end of each business day so that all dispensed or entered medications are captured.
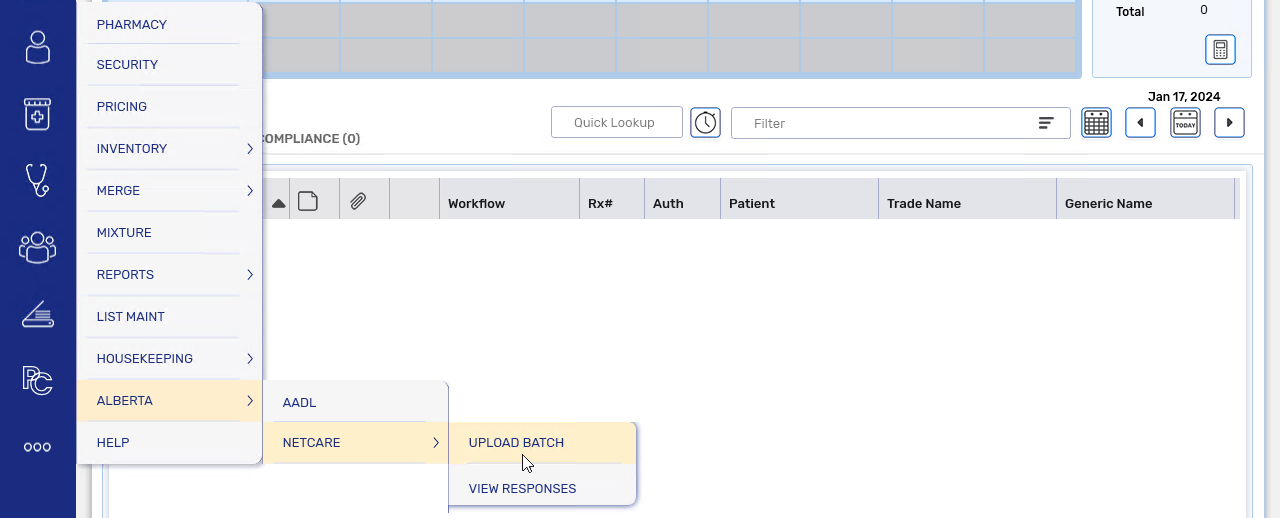
To upload a Netcare Batch:
-
Select More (...) > Alberta > Netcare > Upload Batch. The user must have a Pharmacist role type for this button to be enabled.
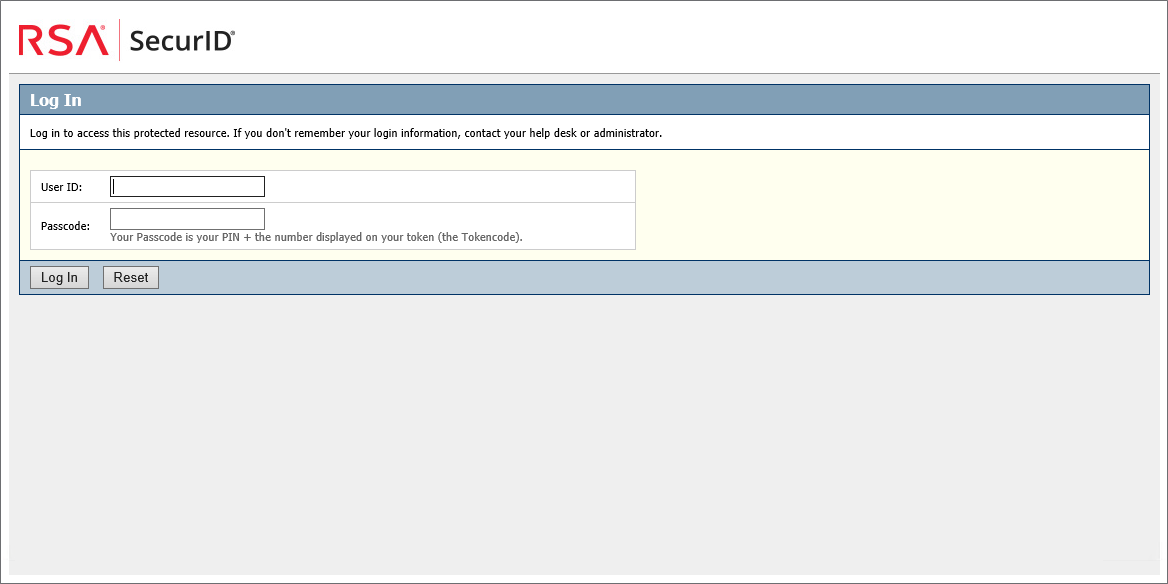
The RSA SecurID Login website launches in your browser. Alberta Netcare portal is protected by RSA SecurID. This is the first level you must log into to gain access to the Netcare portal.
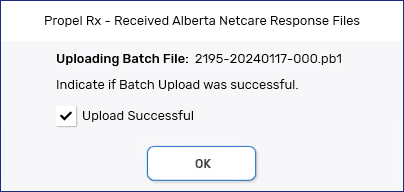
A Received Alberta Netcare Response Files prompt will open in Propel Rx. Do not action this prompt yet. You must complete the steps below first.
-
Enter the following:
-
User ID = RSA SecurID username provided by Alberta Netcare.
-
Passcode = 4 digit PIN followed by the 6 digit number on your FOB device. If you have a soft token (e.g., app on the phone), only the token number needs to be entered.
-
-
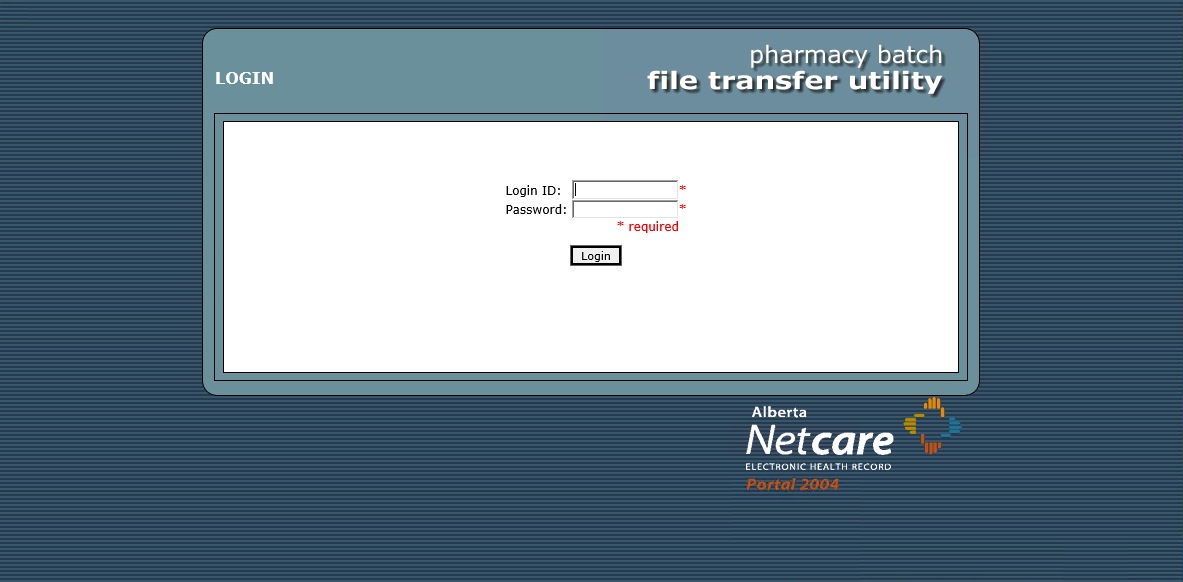
Select Log In. If the login was successful, the pharmacy Batch file transfer utility login window will load. This is the second level in the two-level login where only users with Alberta Netcare Batch permissions can log in.
If your login attempt is unsuccessful, do not try again using the same passcode. Wait until a new token number is generated on your device. If you forgot your User ID, call the Alberta Netcare Help Desk.
-
Enter your Alberta Netcare Login ID and Password. These credentials are not the same as the ones used on the previous window.
-
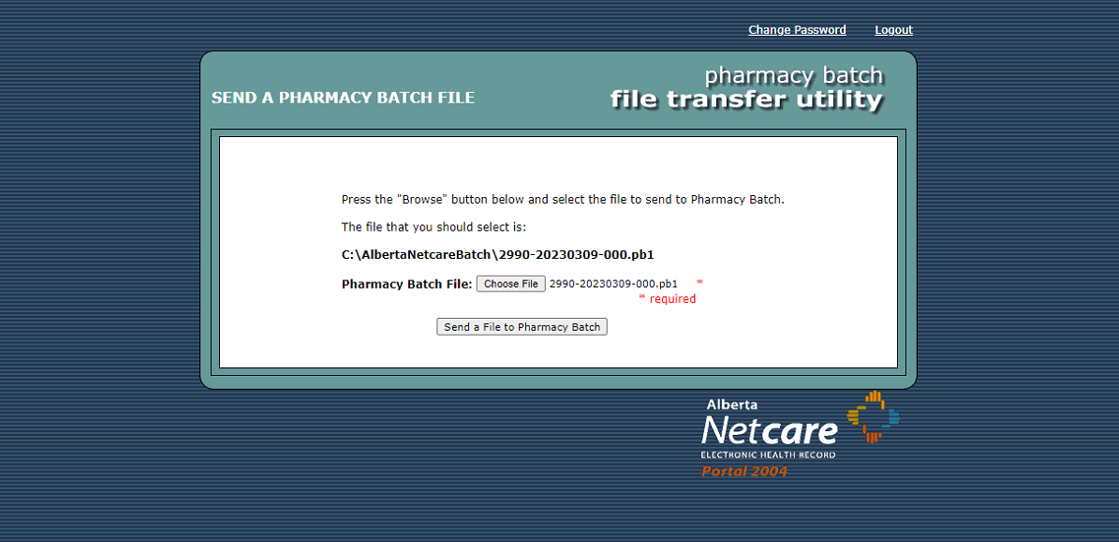
Select Login. If login was successful, you will be directed to a page to browse for and send the pharmacy Batch file.
-
Select Choose File to open File Explorer.
-
Navigate to the file location displayed at the top of the file transfer utility window.
The name of each file is similar because it is stored in the same folder on your hard drive - only the date and file number will change (e.g., 20230310-000).
-
Select the matching file and then select Open. The file name must be identical to what's displayed in the file transfer utility window.

-
Select the Send a File to Pharmacy Batch button. There will be a brief delay before the next window loads while the file is transmitted to Alberta Netcare.
-
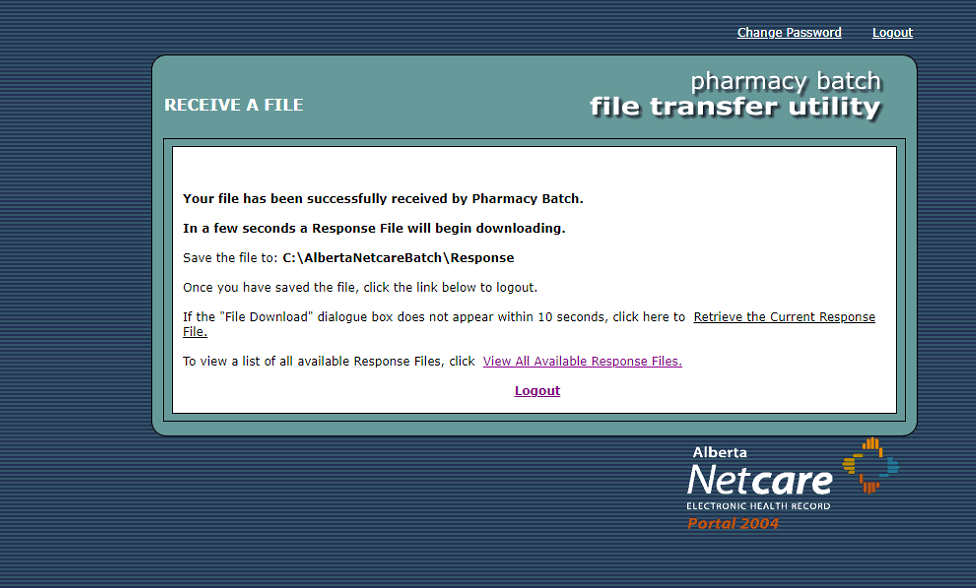
If the upload was successful, a successful message will appear in the window, and the response file will be downloaded automatically. If the response file does not begin to download within 10 seconds, select the Retrieve the Current Response File link.
-
Do one of the following:
-
If you are prompted to save the response file, save it to the C:\AlbertaNetcareBatch\Response folder.
 How to Enable the Download Prompt in Microsoft Edge
In Microsoft Edge, you can turn on a prompt which asks you if you want to save or open a download. From the prompt, you can choose where to save a download each time.
-
Select the three dots (...) at the top right corner of the Microsoft Edge browser. A dropdown menu appears.

-
Select Settings.
-
On the left menu, select Downloads.
-
For Ask me what to do with each download, drag the pointer to the right. This will turn on the prompt for each download.

-
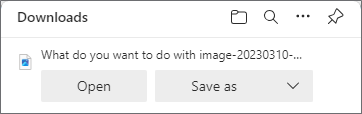
When a file is downloaded, a prompt appears. Select the Save as option to open File Explorer and choose the location where you want to save the files.
-
-
If the response file was saved automatically to a default location, open File Explorer > copy the file > paste it into the C:\AlbertaNetcareBatch\Response folder. If you do not know where the file was saved, you can check your default download location in your browser's settings.
How to Check the Default Download Location in Microsoft Edge
-
Select the three dots (...) at the top right corner of the Microsoft Edge browser. A dropdown menu appears.
-
Select Settings.
-
On the left menu, select Downloads.
-
The default download file path is displayed under Location. If desired, select Change to choose a different default location.

-
The response file must be saved to the C:\AlbertaNetcareBatch\Response folder for it to be viewed in Propel Rx.
-
-
Select Logout.
-
In Propel Rx, select the Upload Successful checkbox in the Received Alberta Netcare Response Files window.
Only select this checkbox if the file upload was indicated as successful on the Alberta Netcare site. If the upload was not successful, do not select this checkbox and proceed to step 14. This will allow you to include the prescriptions again in the next Batch.
-
Select OK.
-
If the Upload Successful checkbox was not selected, a warning prompt asks you to confirm if the upload was not successful. If this was the case, select Yes.
-